Welcome to what will hopefully be a useful guide to running Curse of Strahd. My goal here is to provide a resource for all of us DMs to use. I am going to go through the book and try to organize things, figure out any confusing sections, and possibly provide cheat sheets for any scenes with a lot of moving parts.
I made a .pdf of this guide and added in a bit of new material.
You can get it here at the DMs Guild. It is in a print-friendly format.
You can buy this adventure and the tarokka deck on amazon here:
Curse of Strahd: A Dungeons & Dragons Sourcebook (D&D Supplement) D&D: Curse of Strahd Tarokka Deck
 Official Links
:
Death House A pdf of the level one adventure from Curse of Strahd
New Character Options Revenant race, Monster Hunter and Inquisitive
Haunted One Background and Trinkets
Table of Contents
Barovian Souls
Blinsky Toys These are great. Each has its own art.
Story Bible
Curse of Strahd Walkthrough Map Get this!
Black and White Free Maps (untagged)
All of the Maps by Mike Schley
Handouts
Volo's Visit to Barovia A great story/overview of Barovia by Ed Greenwood
Adventurers' League DM and Player Guides
Adventurer's League Launch Page
Dice, Camera, Action! This is a stream of the adventure's author running Curse of Strahd. If you have the time, definitely check this out.
Buy the Tarokka Deck Here
Other Links:
An Enhanced Version of Strahd
List of the Deadliest Encounters in Curse of Strahd
Enhancing Curse of Strahd
Merric Blackman Curse of Strahd Playthrough
The Id DM Death House Notes and Ideas
Learning DnD Curse of Strahd Playthrough
My Links:
How to Run Curse of Strahd
My Review/Rundown of Death House
Guide to Strahd von Zarovich
Guide to Vampires
Planning
You should definitely check out the Adventurers League DM Guide for Curse of Strahd, as it has a number of fun things you might want to include in your game.
Jenny Greenteeth: This hag can help out the adventurers and she is the only spellcaster who offers services in Barovia. The heroes have to pay her in gold and will also have to do a random hilarious chore for her.
Death in Ravenloft: This rule option says that if a character is under 5th level and they die, the Dark Powers of Ravenloft will resurrect them! The adventurer will rise up the very next round, but they will have to roll on a chart for a "dark gift." They will also be Touched by the Mists. "
You're tainted by evil. Cats hiss as you approach, milk sours at your touch..." The character also gains..
Resurrection Madness: Souls of the dead are trapped in Barovia. When the character is
resurrected they gain a form of indefinite madness from realizing that their
spirit is trapped in Ravenloft, possibly forever. This is discussed in the Curse of Strahd book on page 24.
Curse of Strahd Level Guide
Roaming Barovia: This adventure is wide open. It is possible that the heroes will end up in a place way too dangerous for them. If this is something you don't normally do, you might want to alert your players before the first session of this fact. Some players go into a campaign with the assumption that everything is scaled to their level. Here is the areas by level chart (page 6) with page numbers for each area:
(Level 3) Village of Barovia: Flavor page 33 (the heroes will likely hit A, B and C before arriving at Barovia),
(Level 4) Town of Vallaki: Page 95
(Level 4) Old Bonegrinder: Page 125
(Level 5) Village of Krezk: Page 143
(Level 5) Wizard of Wines Winery: Page 173
(Level 6) Van Richten's Tower: Page 167
(Level 6) Yester Hill: Page 197
(Level 7) Argynvostholt: Page 129
(Level 7) Werewolf Den: Page 201
(Level 8) Tsolenka Pass: Page 157
(Level 8) The Ruins of Berez: Page 161
(Level 9) Castle Ravenloft: Page 49
(Level 9) The Amber Temple: Page 181
Appendix A: Character Options
(Page 209) Don't forget,
there's a free pdf of this section here. I am putting this appendix here because this background stuff should be handled before the campaign even starts. All of the "Haunted One" options can be linked to entities in the adventure.
Harrowing Event: For most of these, the vestiges in the Amber Temple seem like the natural choice. Definitely check out pages 191-196.
- The monster could be linked to one of the vestiges (page 191-196).
- The "dark star" is probably a reference to a vestige - Zhudun the Corpse Star on page 196.
- Not sure about this one. Maybe it's Strahd's dead brother Sergei, reaching out for someone to rescue Tatyana/Ireena.
- Again, this sounds like it calls for a vestige (pages 191-196).
- I just realized that the best choice for this is that the sibling is Izek Strasni (pages 231-232). It fits perfectly. I guess you could go with Ezmerelda (page 231). If you want to go real dark, you could say that the sibling died and many of her body parts were used to create the flesh golem bride (read S13. Main Hall on pages 150-151).
- You should probably link this to the werewolf clan in chapter 15 (page 201). You can use the "Werewolves in the Mist" hook on page 21. The werewolves have been able to creep into the Misty Forest and go back to Barovia.
- This should definitely be Baba Lysaga (stats on page 228, her home is on page 163). Remember that the creeping hut is a new development, it hasn't been around for long.
- This tome might be a book in the Amber Temple library. It might relate to Vecna or one of the vestiges.
- I'd probably go with a cacodemon servant of Shami-Amourae (page 192) or Seriach the Hell Hound Whisperer (page 193). Maybe the hero can summon a weak hell hound, or become one for a short time.
- You could say that the murderers were vistani. They come and go from Barovia as they please. Maybe pick one of the vistani in the camp on page 119 as a murderer who got away. Ezmerelda (page 230) was a vistani who went rogue, maybe she helped this character escape.
List of Blinsky Toys
Toys from Curse of Strahd (compiled by Brian McDaniel)
- Malformed Doll. Strange leer and sackcloth dress; hand-me-down from Mad Mary to daughter Getruda. (Barovia Village E3 p.44)
- Plush
Werewolf. Stuffed with sawdust and wood-carved babies; blade claws and
retractable teeth. (Castle Ravenloft Random Encounter p.50)
- Jester Marionette. Tangled strings and copper bells. (Castle Ravenloft Random Encounter p.50)
- Wooden Puzzle Box. Carved with clown faces; rattles but is empty. (Castle Ravenloft Random Encounter p.50)
- Faceless Doll. Aged wedding dress. (Castle Ravenloft Random Encounter p.50)
- Coffin Jack-In-The-Box. Contains Strahd puppet. Plush Werewolf. (Castle Ravenloft Random Encounter p.50)
- Wooden Teeth with Fangs. Spring-loaded and will chatter for 1 minute when wound. (Castle Ravenloft Random Encounter p.50)
- Marionette
Puppet Theater. Includes king, queen, prince, princess, executioner,
tax collector, dunce, vampire, and vampire hunter. (Vallaki N20 p. 102)
- Toy Vistani Wagon. Includes horse and Vistani figures. (Vallaki N20 p. 102)
- Pair of Clown Masks. One scowling, one frightened. (Vallaki N20 p. 102)
- Wooden Top. Shows scarecrows chasing children. (Vallaki N20 p. 102)
- Stuffed Bat. Puppet strings. (Vallaki N20 p. 102)
- Ireena Dolls. Pretty little dolls with white skin and auburn hair. Made for Izek to obsess over. (Vallaki N3j p.107)
- Torn-Up Vistani Doll. Colorful clothing. Used by Rictavio to train tiger. (Vallaki N5 p.116)
- Headless Doll with Attachable Heads. Includes head with eyes and mouth sewn shut. Gadof Blinksy stock. (Vallaki N7 p. 118)
- Miniature Gallows. Includes weighted “hanged man.” Gadof Blinksy stock. (Vallaki N7 p. 118)
- Wooden Nesting Dolls. Innermost doll is mummified corpse. Gadof Blinksy stock. (Vallaki N7 p. 118)
- Bat Mobile. Wings flap. Gadof Blinksy stock. (Vallaki N7 p. 118)
- Musical Merry-Go-Round. Winds=up; wolves chase children. Gadof Blinksy stock. (Vallaki N7 p. 118)
- Strahd Ventriloquist Dummy. Gadof Blinksy stock. (Vallaki N7 p. 118)
- Nightmare Rocking Horse. “Bucephalus” carved on it. (Wizard of Wines W19 p. 179)
- Zombie Doll. Resembles a PC. (Werewolf Den Z5b p. 203)
Toys from Dice, Camera, Action
- Strahd Doll. Scry/Dream focus for Strahd ? (Dice, Camera, Action episode 13)
Selected Toys from Dragon+
- Eye Marbles. Eyes appear to be looking at roller. (Dragon+ Issue 207 #14)
- Bone Slide-Whistle. Carved skeletal figure. (Dragon+ Issue 207 #14)
- Hag Doll. Three child-dolls in stomach. (Dragon+ Issue 207 #14)
- Hunter/Wolf Doll. Plush hunter doll turns inside out into black wolf. (Dragon+ Issue 207 #14)
- Bone Dominos. Domino set carved from bones. (Dragon+ Issue 207 #14)
- Stitched Teddy Bear. Made of different parts of other teddy bears. (Dragon+ Issue 207 #14)
Before You Start the Campaign
Here's some stuff you might want to do before you begin the first session. You might also want to check out
my "How to Run Curse of Strahd" article which gives details on how to plan out your campaign.
- Decide Between Level One or Level Three: If you want to run "Death House" (page 211) start the group at level one. If you want to jump right in to the main adventure, have the group make level three characters.
- Do a Tarokka Reading: This reading might be supplanted if the heroes visit Madame Eva. The Tarokka rules are on page 11.
- Handout: Print out the handout called "Version Two" on page 256 in case the heroes find the body in the Svalich Woods (page 34).
- Notes: Check out page 7 and maybe jot down a few little moments like a sight only the hero with the highest passive perception sees, an example of age, etc.
- Page 35 is Your Friend: Put a tab or bookmark or something on page 35. It's got the map of Barovia and descriptions of all the weird little random areas. You'll be flipping to this a lot.
- The Mists: Make sure you understand how the mists work (page 23) and have those elusive exhaustion rules ready (Player's Handbook page 291). When you're in the fog, you're heavily obscured (PH page 183) which means you are blinded - attacks rolls against the blinded person have advantage, and the blinded person's attack rolls have disadvantage.
- Souls: Make sure you understand Barovian Souls (page 24). Only 1 in 10 Barovians have a soul!
- The Dark Powers: Check out the mysterious evil entities in the Amber Temple (pages 191-196). These creatures offer the heroes dark gifts that might turn the character evil. If you think you have a player who would get a kick out of this, consider having a chosen entity reach out to the hero throughout the adventure, calling them to the amber temple. Personally I would try to work Tenebrous or Shami-Amourae into this any way I could. You could do a variation on the 2e "dark powers check" rules.
- NPCs: Make a list of Barovian names (use the name list on page 25). There are a lot of points in this adventure where the heroes will interact with someone, and it's up to you to name them. I think you should have the first and last names of at least five men and five women ready.
- Roll Treasure: Roll on the treasure chart on page 37, in case the group gets to the Tser Pool Encampment. This way you don't have to stop the game to roll dice and possibly look up a magic item at the table.
- Special Items: There are items in the castle that can be used in locations to get stuff. The thing about this is, once you've dealt with the castle, the campaign is over. So you should look at those places and see if you want to change where the adventurers find the item, so they can actually use some of this stuff before the adventure is over. The heroes can free the revenants on page 142 and get permanent bonuses, and they can get a ring of regeneration on page 148.
- Trinkets: To save game time and to maximize trinket-ness, pick out some trinkets (page 210) that you want the heroes to have. There's a few points in the adventure where the heroes will find a trinket.
- Zombies: Make sure you have Strahd Zombie stats ready, maybe roll out how many zombies there are in a house or two. There are zombies in houses in Barovia, the first place the heroes are likely to explore.
- Yikes: Check out/absorb the night hag stats just in case things get hairy when the heroes get to page 48.
- Marching Order: When you sit down to play, ask your players to establish a marching order. Tell them that unless you are told differently, this is the order you will assume they are traveling in. There are a number of traps that will hit the person first in line, so you need to be clear on who that is beforehand.
- Gay Stuff: There are a number of gay NPCs in this adventure.
Where I live in New York this isn't a big deal, but if you think there
might be problems you should mention this to your group before you even
start the adventure. You don't want one person making jokes that offend
others. It could get out of hand really fast. If you are running this in
a public game store, be extra mindful! The last thing you want is for a
closeted, shy player who has chosen D&D as a way to connect
socially have insults shoved in their face.
- Ezmerelda: Ezmerelda is an NPC who may accompany the group on the adventure. Almost every chapter has a way to get her to meet the party. Personally, I think she should join the group in Chapter 11 (see page 172). Her stats are on page 231.
- Once You Start: Write down a deed each PC has done, either in the adventure or as part of their background. Madame Eva will know these things (page 37) and players might get a kick out of it when she meets them.
- It's Always Cloudy in Barovia: Remember that it is always raining or cloudy. The sun does not come out until the very end of the adventure, once Strahd is defeated.
- Use Ravens to Guide the Group: Throughout this adventure, ravens (wereravens - the Keepers of the Feather - page 98) try to help the heroes and lead them to places, or warn them off. It is entirely possible that the heroes will end up heading to a place that is way too deadly for them. You can use the ravens to warn them. You might want to use Muriel Vinshaw (see page 165) if the heroes are in a pinch.
How to Start the Adventure
1.
Adventure Hooks: Pick a hook from the pile on pages 18-22 and run it. Here's the three that I think are kind of the "main" ones:
- Plea For Help (page 18): A gypsy gives the group an invite to Ravenloft. These people are scum (check out the whipping scene on page 121).
- Creeping Fog (page 22): The heroes are camping, the mists take them to Ravenloft.
- Mysterious Visitors (page 19): The group investigates gypsies, are escorted through Barovia.
2.
The Lands of Barovia: Go to the map of Barovia on page 35. The heroes come in on the far right of the map and experience these encounters in order:
- A. The Road (page 33): Creepy forest. The heroes walk for 5 hours and then...
- B. Gates of Barovia (page 33): Headless statues, gate swings open. The image of this place is on the bottom of page 34.
- C. Svalich Woods (page 34): Where they might find a dead guy with a letter.
3.
The Village of Barovia: Once the group gets to town, there are some choices to make:
- If the heroes are level 1: and you are going to run "Death House", skip to page 211 and read that flavor text. Once this adventure is done, then proceed...
- If the heroes are level 3: read the flavor text on page 41 (Mad Mary's weeping).
- As the Group Begins to Explore the Town:They see an old lady selling dream pastries (she does her best to avoid the heroes). This one is a bit weird and dangerous.
- Follow the Weeping: Checking out the weeping will bring the group right by Bildrath's Mercantile and the Blood of the Vine Tavern. A major NPC awaits the heroes in the tavern, so put a neon sign on it or something.
- Exploring: The group will probably check out Mad Mary (page 44), then buy some stuff at Bildrath's (page 43) and check out the tavern (also page 43).
- The Tavern: The heroes can meet Ismark. If you did the "Pleas for Help" hook, Ismark says the letter is a forgery. Ismark wants the heroes to come to his mansion to help his sister...
- Burgomaster's Mansion (page 44): The heroes meet Ireena and see that their father needs to be buried in the cemetery...
- Church (page 45): There's a vampire spawn and some shenanigans.
Chapter 1: Into the Mists
Strahd's Plans: Strahd has got three goals:
- Turn Ireena: Strahd thinks she is his love Tatyana reborn. He has already drank her blood twice. The next time he does so, he will kill her and turn her into his vampire consort.
- Find Dr. van Richten: Strahd wants to find him and break his spirit.
- Search for a Successor/Consort: Strahd will test the heroes to see if they are worthy. The more challenges they overcome, the more he is interested in them.
Strahd Should Interact with the Characters Multiple Times: I would suggest that you have Strahd meet the characters when they are level 4 and see how it goes. I would be a little worried as a DM of 7th/8th level heroes taking Strahd down with some clever trick.
Bonus Hit Points: As far as I can tell, the Heart of Sorrow (check out page 59) absorbs Strahd's damage, up to 50 hit points. This gives you a nice buffer. Strahd can show up and do something evil. The heroes might hit him a few times, and it will seem like he takes no damage at all. The he turns into mist and heads back to his castle. I'm still reading up on the heart of sorrow, but this is my understanding so far.
Beucephalus: Remember, Strahd can ride his nightmare! It flies, it can go ethereal, it's very handy. Strahd could hover far above the heroes and drop level 4 fireball spells on the heroes if he wanted to. Beucephalus, "the Wonder Horse" is detailed on page 93.
Fortunes of Ravenloft
 |
| Crowns in corners = High Deck |
You will need the
Tarokka deck or playing cards. You could also just narrate the scene and predetermine what cards are drawn based on how you want it to go. Make sure you write down the results of the reading.
When to Do the Reading: You should do the reading once before you run the adventure. Then, if the characters meet Madame Eva, do it again and have that reading be the "official" one. You can also have Ezmerelda do a reading if the heroes don't meet Madame Eva.
Card Reading: This reading determines all of the important details of this adventure. Let's go through it step by step:
1. Make Two Decks: You are going to take 14 cards and make the high deck. The rest of them are the common deck:
- High Deck: Artifact, Beast, Broken One, Darklord, Donjon, Ghost, Executioner, Horseman, Innocent, Marionette, Mists, Raven, Seer, Tempter.
- Common Deck: All the other cards.
2. Set Up: Shuffle each deck. Check out the diagram on page 11. Then:
- Draw three cards from the common deck and put them in positions 1, 2, and 3.
- Draw two cards from the high deck. Put them in positions 4 and 5.
3. Do the Reading: Now you're going to flip them over in number order, and match up the cards with the entries on pages 12-17.
Common Deck
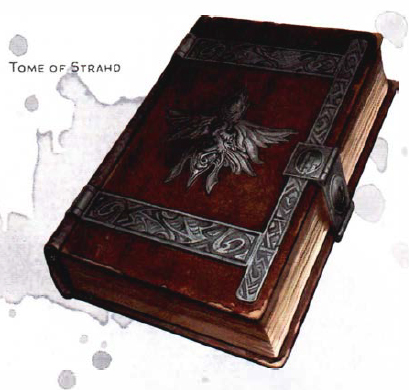
- Card 1: Match this up with the entry on pages 12-15. This determines where the Tome of Strahd is.
- Card 2: Match this up with the entry on pages 12-15. This determines where the Holy Symbol of Ravenkind is.
- Card 3: Match this up with the entry on pages 12-15. This determines where the Sunsword is.
High Deck
- Card 4: Match this up with the entry on pages 15-17. This is Strahd's Enemy, an NPC that can help you.
- Card 5: Match this up with the entry on page 17-18. This determines where Strahd can always be found.
Write down the results! It is extremely important! There you go. Reading done.
Notes on the Cards:
NPC Aid: Remember that the NPC who is Strahd's Enemy has a special power that can give a character inspiration.
Drawing the Darklord Card for Strahd's Enemy: This one is kind of a bummer. The heroes have no NPC ally. I think if I drew this I'd change it - I'd just pick the NPC I want (Rictavio or the Mad Mage).
Adventure Hooks
Mysterious Visitors (page 19): Keep in mind that the group will be with the Vistani. They'll pass through the gates (page 33), Barovia (page 41) and River Ivlis (page 35).
It's kind of weird to go through the town of Barovia with the Vistani. Do they stop or do they pass through? Or do the vistani wait outside town and let the heroes wander? The vistani would probably know the three women who own the Blood of the Vine Tavern.
Faction Info: Here's the faction NPCs for those using the Forgotten Realms or running in the Adventurers League:
- (Harpers) Zelraun Roaringhorn: Human mage who gives each Harper PC a scroll of remove curse (PH page 271). He can have the characters' weapons silvered, too.
- (Order of the Gauntlet) Lanniver Strayl: Human knight, follower of Tyr. Gives each faction PC a potion of heroism (For 1 hour you gain 10 temporary HP and the effects of a bless spell - PH page 219).
- (Emerald Enclave) Nobody: Nobody!
- (Lords' Alliance) Eravien Haund: Half-elf noble who knows a lot. He gives Lords' Alliance PCs a scroll of magic weapon (PH page 257) and a mark of prestige - letter of recommendation (DMG page 228).
- (Zhentarim) Davra Jassur: Human assassin - her husband was killed by the werewolves. She can give the Zhentarim PCs a mark of prestige - special favor (DMG page 229).
Spell Scrolls: Spell scrolls are detailed on DMG page 200. I have a hard time remembering all the ins and outs of these, so here's everything you need to know:
- Who Can Use Scrolls: If the spell is on your class's spell list, you can use an action to cast it off the scroll (no components needed).
- Who Can't: If the spell isn't on your class list, it is unintelligible to you.
- High Level Spells: If the spell is a higher level than you can cast, you make an ability check: DC = 10 + the spell's level. Fail means the scroll is wasted! You might want to use the Scroll Mishap table (DMG page 140).
- Determine DC and Bonus: Check the chart on DMG page 200 to see what the Save DC and attack bonus is.
- How to Copy a Scroll Into a Spell Book: You can copy a spell off of a scroll into your spell book. Make an Intelligence (Arcana) check, DC = 10 + the spell's level. The scroll is destroyed whether the roll is a success or not. Once the magic is invoked, it crumbles to dust.
Chapter 2: The Lands of Barovia
Demiplane: Barovia is a demiplane formed by Strahd's consciousness and surrounded by fog. No creature can leave without Strahd's permission.
Setting DCs: A good rule of thumb when you're figuring out a DC on the fly: When in doubt, it's a 15. Check the bottom right of page 33. It's almost all 15's.
Things the Heroes can Learn: Barovians can tell the characters useful info from the lists on page 26.
Magic & Etherealness: Check page 24 for all of the little changes to magic. You can go ethereal in Barovia, but once you leave the ethereal, you appear back in Barovia no matter where you went. So I guess if you go in the ethereal and you find an ethereal curtain (portal to another plane), when you go through you just pop out in Barovia.
Resurrection: If you die, your soul is trapped in the mists. If you are dead 24 hours before being raised, you gain indefinite madness (DMG page 260).
Clerics: Clerics do still get their spells.
Mists of Ravenloft: The Mists are important (see page 23). Here's the deal:
- Deadly: If you start your turn in the mists, make a DC 20 CON save. Fail means you gain a level of exhaustion (PH page 291). You can't reduce this exhaustion until you leave the mists. Once you hit level 5 exhaustion, you can't move. Level 6, you're dead!
- No Escape: Wandering in the mists always ends up with you back in Barovia.
- Pea Soup: The area in the fog is heavily obscured (you're blind - you have disadvantage to hit things, and things have advantage to hit you).
Souls: 1 in 10 Barovians have a soul. When someone dies in Barovia, their soul is trapped. After decades, the soul is reincarnated into a newborn. If Strahd is defeated, they can leave Barovia.
Shells: The rest are "shells" - mindless, depressed people. They can and do have children, who sometimes have souls. Even if Strahd is defeated, shells cease to exist if they try to leave Barovia.
Strahd can't Feed on Shells: Strahd can tell who has a soul and who doesn't. He gains no nourishment from shells.
Two "Gods" Exist in Barovia: Mother Night and the Morninglord. I don't really know anything about these two. The Morninglord rules the day. The people believe Mother Night sent Strahd to punish them for their ancestors' offenses.
Vistani: They're gypsies, secret spies for Strahd. Strahd lets the Vistani come and go from Barovia as they wish. They know some lore, found on page 27. They have powers:
- Vistani Curses: Vistani can curse people who are within 30 feet (see page 28). The curse goes like this: WIS save DC 13? Madame Eva has a DC of 17. The curses range from making it impossible to tie a rope, to going blind and deaf. I guess this is a power to use when the heroes mistreat a vistani.
- Evil Eye: (page 28) This can charm person or hold person, save each round.
Random Encounters: (page 29) Check every 30 minutes of travel. Roll a d20. 18+ means an encounter. My favorites are Corpse, Revenant, Skeletal Rider and Trinket. Here's some notes:
- Creepy Thieves: I love the idea of a spy trying to steal hair and pieces of clothing from the characters, to enable Strahd to scry them better.
- Corpse: Finding a corpse of yourself.. awesome.
- False Trail: Spiked Pit (DMG page 123). Save DC is 12-15 (you pick). Damage = 11 (2d10).
- Hunting Trap: (PH page 152) DC 13 DEX save, d4 damage and stop moving. Escape = DC 13 STR check. Fail = 1 point of damage. It's like a bear trap - it clamps on your foot/leg and is attached to a chain that is held in the ground by a spike.
- Revenant: This might be a cool NPC to jump in and help the heroes fight some of Strahd's wolves. Revenant stats - MM page 259.
- Skeletal Rider: This could be fun to use fairly regularly. Maybe you could make it where the rider is eternally looking for a way out of Barovia. They might spot the skeleton near the mists, poking around, trying to find a way through.
- Trinket: The trinkets (page 210) are awesome. Pick a few in advance!
Areas of Barovia (page 33)
Gates of Barovia: (page 33) When I read about the gates, I had a picture in my head. When you look at the art of this place on page 34, it's quite more grand than the flavor text suggests. Definitely check that picture out, it will help make the beginning of this adventure bigger. Remember, the gates open and close on their own.
Svalich Woods: The letter is on page 256. The heroes may eventually learn that the letter was forged by Strahd. Dire Wolves are on MM page 321. Wolves are on MM page 341.
Tser Pool Encampment: (page 36) This place is important. This is where Madam Eva is, so we'll do the Tarokka reading here. The wizard in the vistani's story is the Mad Mage on page 39. You might want to roll the treasure in advance (page 37) so if it's a magic item, you can select what it is without slowing the game down.
Gates of Ravenloft: (page 38) There's a thousand foot drop so.. you know, you're dead. Green slime is on DMG page 205: DC 10 DEX save, 5(d10) acid damage. It does 11 acid to wood or metal. It does this damage until scraped off. You might want to have the slime damage the boots of some of the PCs to set up my idea for Helga (page 64). The gates lead to the Front Courtyard (page 52).
Lake Zarovich: (page 38) Wow. A drunk guy puts a little girl in a sack and chucks her into the lake. She demands that the heroes bring her to the Vistani Camp (it is "N" on the Barovia map, description on page 119). She is Luvach's daughter (page 122). Luvach will ask the heroes to find her, if they don't find her on their own.
Mad Mage of Mount Bartok: Wow. The Mad Mage is D&D famous! Stuff to consider:
- Prepare Spells: You should definitely make notes on a few spells you want him to use - Time stop? Cone of cold? A lightning bolt cast at an 8th level slot? And definitely counterspell. Read up on them, maybe write down what they do and a page number in advance.
- Mansion: The magnificent mansion is on PH page 261.
- Reward: If the heroes help him shake off his nuttiness, he gives them each a charm of heroism: It gives the effect of a potion of heroism. Let me save you the comedy of references that is the charm of heroism. Here is what it does: +d4 to attack rolls and saving throws for one minute (10 rounds). 10 temporary hit points for one hour. Wow.. imagine having this guy as Strahd's Enemy.
Chapter 3: The Village of Barovia
This area is scaled for level 1-3 characters.
When the Heroes Arrive: (page 41) Read the flavor text out loud. The group can hear Mad Mary weeping (page 44). They spot a lady in rags (page 48). Ultimately the group is going to want to get to the Blood of the Vine Tavern (page 43) to meet Ismark.
Strahd Zombies: You might want to cook up an encounter in a house with some Strahd Zombies (page 241). The zombies are fun - you can cut their limbs off when you do 5 damage or more. If you have a group that likes combat, this is an entertaining way to keep them satisfied as they explore.
Dream Pastries: (page 48) When exploring, the heroes are meant to notice a hunched figure in rags. She sells dream pastries (see page 125). They are 1 gp each. The pastries put you in a happy dream-trance: DC 16 Con save, fail = incapacitated and 0 speed for d4+4 hours. The secret ingredient: Bones of innocent children! Seriously! This old lady is actually a hag named Morgantha. She lives in the windmill (see page 127). She can see through an eye that Cyrus Belview is wearing on a necklace in Castle Ravenloft (Cyrus is on page 77). She probably knows quite a bit about the interior of Castle Ravenloft. If the adventurers get in a fight with her, they will probably die.
Parriwimple's Stats: He might need to rough up the heroes in Bildrath's Mercantile (page 43).
Parriwimple: (Gladiator, MM page 346) AC 14 HP 112! +7/+7/+7 13(2d8+4)
- Parry: +3 to AC against one melee attack.
 |
| Morbid Molly, Gertruda's doll |
Mad Mary: (page 44) She's a creepy lady whose daughter, Gertruda, is gone. The heroes don't know it, but they will eventually meet Gertruda in Strahd's Castle (page 68. The doll Mad Mary is holding
is detailed here.
Blood of the Vine Tavern: (page 43) Two things to keep in mind here. One is that the sisters suggest that the heroes meet Madame Eva. The other thing is that the heroes can meet Ismark here. Ismark wants the group to meet his sister Ireena, who plays a gigantic role in this adventure.
In his article in Dragon Plus issue 6, Ed Greenwood wrote about the menu of this tavern:
"Stews and ale and warm round loaves of dark nut bread with strong yellow-green cheeses of unfamiliar local varieties."
 |
| Ireena |
Burgomaster's Mansion: (page 45) Our heroes meet important people. Here's stuff to keep in mind:
- Strahd's Army: Strahd had wolves and zombies attack the house for weeks. The stress caused their father, the Burgomaster, to die.
- Strahd got to Ireena: Strahd visited her twice, but the memories are hazy. She remembers the blazing hunger in his eyes.
- We Need to Bury the Dad: Ireena and Ismark want to bury their dad, but there are screams coming from the church. The heroes need to bury the dad. Ireena and Ismark won't do anything until this is done.
Church: Keep note of what time it is in the game. If it is midnight, the march of the dead happens (page 48). If you've ever played or run Ravenloft before, maybe have old characters as some of the ghosts, just for fun. You could also have these ghosts be the spirits of the dead adventurers found in the cells on pages 80-82.
Chapter 4: Castle Ravenloft
This area is scaled for level 9 characters.
I am using art from Jason Thompson's walkthrough poster. This gigantic map is a great way to get a look at what is actually in each room.
You can buy a print of this map here. I photoshopped in the room numbers and added some words to some of these images for the sake of clarity.
Make sure you are prepared before the group goes in:
- Marching Order: Make sure you know the marching order of the party before you go in here. You will need to know who is in front and back at certain times. Also, there is a trap on page 80 where it will be important to know if your group is single file or not.
- Write Down the Weight of Each Character: There are a few traps which are triggered by weight. It is particularly important for the trap on page 80.
- Lots of Perception Stuff: Write down the characters' passive Wisdom (Perception) scores.
- Tarokka Placement: Don't forget to implement the tarokka results. Strahd will be in a specific area and there might be a magic item or two here depending on the cards you drew.
- What Time is it? Make sure you establish what time of day it is when the group enters. There's at least one room (K50. on page 70) where it matters if it is day or night.
- Make a Map: You might want to draw or make a map of room k84 (page 85). The group might spend a lot of time in there, and it is important to know who is standing where. There's a million traps and monsters, and positioning will matter. There is a top-down map here. The 3e isometric map is here.
- NPC Prep: The heroes might end up with a buddy or two. Maybe have stats handy for Sir Klutz (page 91), Gertruda (page 68) and Pidlwick II (page 236).
Random Encounters: (page 49) Roll a d20. 18+ means there is a random encounter. Check at these times:
- Every ten minutes when resting in the castle.
- When the heroes enter an unoccupied area for the first time.
You might want to roll the unoccupied room ones ahead of time so it doesn't slow the game down at the table. There are a ton of unoccupied areas.
Here's some notes on some of the encounters:
- Black Cat: You might want to do what they did in one of the older Ravenloft modules. If the black cat crosses a character's path, something bad happens to them soon. Maybe they have disadvantage on certain rolls for a short time.
- Blinsky Toy: The Strahd coffin jack-in-the-box is awesome.
- Ezmerelda D'Avenir: I love the tap on the shoulder.
- Strahd: This is cool, but be careful. You can have him turn to mist after he gets a shot or two in. I find surprise to be a little tricky. First, roll to see who is surprised. Then, roll initiative. Then proceed in order. The people who are surprised can't do anything until their next turn. No movement, no actions, no reactions.
- Unseen Servant: See PH page 284. AC 10 HP 1. It can't attack. Creatures have disadvantage to hit it. I really like the goblet of wine.
Entering: The group is likely to enter the castle in K7 (page 54). They'll go in, see the dragon statues, move on to K8 and meet Rahadin coming down the stairs.
K1. Front Courtyard: (page 52) You might want to do a thing where some of the characters mess up their boots in the mud. Maybe there are some broken bones half-buried in the mud that tear open the sole of someone's boots. This way, Helga (page 64) can offer to repair them and maybe make friends with the party. You could also use the green slime back at the gate (page 38) to damage boots as well.
K8. Great Entry: (page 55) Rahadin's stats are on page 236: AC 18 HP 135. Remember that those who are within 10 feet of him hear deathly screams and may need to make a save. He is completely loyal to Strahd. He wants to lead the group to K10.
K10. Dining Hall: (page 56) This room is so great. Make sure you get all the little details. The players will be quite freaked out.
 |
| Mace of Terror |
K13. Chapel: There are great items in here:
- Icon of Ravenloft: (page 222) It can heal! That is always useful. Augury is on PH page 215. Remember that Strahd can choose to answer this (see page 24).
- Mace of Terror: (DMG page 180) It can frighten! Pretty cool, great art for it.
 |
| Heart of Sorrow |
K20. Heart of Sorrow: (page 59) It says that the heart absorbs Strahd's damage. So, if you hit Strahd, the heart takes damage, not him. The heart has 50 hit points, and then it shatters.
Ten Animated Halberds: (MM page 20) flying sword AC 15 HP 17 +3 d10+1
K27. King's Hall: (page 62) Roll initiative! Strahd acts on initiative count 5. This is very haunted house-y.
K30. King's Accountant: (page 62) You might want to roll on the chart in advance so you have the stats all prepared. Lief Lipsiege knows where the Holy Symbol of Ravenkind is. You might want to run Lief as an older version of John Harker from the Dracula movies. Maybe an older Kianu Reeves (in my opinion, Bram Stoker's Dracula is mandatory viewing for anyone planning on running this adventure).
Manual of Bodily Health: (DMG page 180) Read this for 48 hours and gain +2 CON. Not too shabby!
K31. Trapworks: (page 63) This leads down through K31b down to K61 (page 74). The sound of this elevator moving can be heard all throughout the castle. I am not clear on how the trap works. Check out page 74. The elevator fills with sleep gas. Now, I am not sure if that means when this elevator comes up, the doors open and the sleep gas pours out? Or does it only affect those in the elevator? Let me know what your thoughts are on this. Those asleep in the elevator are prime targets for Strahd, who can get to this elevator from K47.
K31a. Elevator Shaft: Not sure what the DC is to climb. It says climb is impossible without a climber's kit due to the greasy chains and smooth walls. Seems to me that this is a case where the DC would be a 30. Check DMG page 238. A 30 is described as "nearly impossible," which is what climbing this shaft is supposed to be. You should make that clear to a player thinking of climbing in there.
K32. Maid in Hell: (page 64) What an awesome NPC! You can do a lot of cool stuff with Helga. You could go with the pathetic peasant villager angle, or you could give her a sexy maid outfit. As the bootmaker's daughter she could help the party by tricking out their footwear somehow during a rest, maybe attaching little spikes to the soles or something.
K36. Dining Hall of the Count: (page 65) This is another really fun room. I feel like there might be a cooler effect for the cake, but I can't quite come up with it yet. Pidlwick is amusing.
- Invisible Stalker: (MM page 192) AC 14 HP 104 +6/+6 10(2d6+3)
- Doss Lute: (DMG page 176) If you play this without being attuned, you might take damage. This thing is loaded with spells! Fly, invisibility, protection from fire, and a pile more. This is a major boost for a bard.
K37. Study: You might want to play up the age of the painting of Tatyana. You also might want to flesh out the book titles, maybe tie them in to old Ravenloft products. Here's some ideas I had:
Bestiary of Strange Beasts: Van Richten's guide to ghosts, vampires, etc. Maybe the vampire one is damaged, as Strahd found it insulting and he chucked it.
Book of Military Strategy: This might refer to the Tergs, the barbarian horde that Strahd and his brother battled before Strahd became a vampire.
Epic Novel: There is a famous author who lives in Sigil. Her name is Jeena Ealy (In the Cage: A Guide to Sigil page 72). Stuff she's written:
- In Darkest Sigil: A novel that exposes how poor the quality of life is in the Hive Ward.
- History of the Blood War: The war between devils and demons.
Guide to Wines: You could do a book on planar wines, I have a short list in
my guide to Food and Drinks.
You might also want to place some of the books from page 21 of the original AD&D Ravenloft adventure. They might be too goofy depending on how you run your games:
- Identifying Blood Types: A Beginner's Handbook
- Masonry and Woodworking
There's two others from the 1e Ravenloft: Embalming: The Lost Art, Life Among the Undead: Learning to Cope. But much to my amusement, they are in Curse of Strahd on page 70 along with two new books.
K41. Treasury: (page 67) Lots of loot:
- Daern's Instant Fortress: (DMG page 160). Only Strahd knows the command word.
- Alchemy Jug: (DMG page 150) It can make liquids like acid, beer, mayonnaise and poison. Maybe even poison mayonnaise!
- Helm of Brilliance: (DMG page 173) This thing can cast spells, make your weapon a flaming weapon, and piles more.
K42. King's Bedchamber: (page 68) Gertruda is here, She is Mad Mary's daughter (see page 40). Gertruda thinks Strahd is a great guy.
K46. Parapets: (page 69) If the heroes spend five minutes out here, they will have to deal with Strahd's animated armor (page 227). Remember that it has blindsight and that it has a pretty nice ranged attack.
K47. Portrait of Strahd: (page 69) You might want to creep the players out by having Strahd be in a different pose the next time they look at it.
- Rug of Smothering: (MM page 20). Remember that whoever is being smothered takes half of the damage if the other heroes start attacking the rug.
- Guardian Portrait: (page 227) It has counterspell! Use it!
K49. Lounge: Escher will run and try to to lure them to wherever Strahd is. Remember that he has spider climb, which will help him survive a chase. He might want to climb out onto the rooftop (K53. page 71). Spider climb makes it easy for him and hard for the heroes. Escher seems to have a special role in this adventure, as it is noted that Escher will make an effort to become a vampire lord once Strahd is slain (see "Consorts Unleashed," page 208).
K56. Cauldron: (page 72) Barovian Witch stats are on page 229. I was nervous looking at this room. Fighting seven witches sounds deadly, but then you look at their stats and see that they have 16 hit points.
- If the Heroes are Defeated: I'll tell you what, though. If the witches are invisible and surprise the heroes, and they all cast Tasha's hideous laughter, your group is in huge trouble. I would say that if the witches defeat the heroes, they could tie them up and put them in the cauldron, slow-cooking them to perfection. The witches would leave to let them simmer. The heroes can escape and creep around in their underwear looking for their gear.
K59. High Tower Peak: (page 73) Pidlwick II stats are on page 236. Roll a stealth check at +2 and compare to the group's passive perceptions. Remember Pidlwick II badly wants someone who will enjoy his company, and also remember he has a penchant for pushing people down stairs.
K60a. North Tower Rooftop: (page 74) Swarms of bats are on MM page 337.
K61. Elevator Trap: (page 74) I found this room very confusing, so I broke it down in a way that makes it easy for me to understand it:
- Trigger: 400 pounds of pressure on the plate triggers the trap. It also triggers if someone raises the lever in K31 (page 63).
- The Trap: Solid steel portcullises seal the people standing on the plate in a compartment. The portcullises can't be lifted. It's actually an elevator. It goes up to K31a as magic sleep gas fills the compartment.
- Sleep Gas: DC 15 CON save or fall unconscious for one minute. You can use an action to shake someone awake. Once the save is made, those in the elevator need to roll for initiative.
- The Counterweight: This comes down and lands next to where the elevator was. If you are under this thing and don't move, you are "pulverized."
- Roll Initiative: The heroes must roll initiative. The elevator goes all the way up in one round. They could use this time to wake up an ally, cast a spell, etc. (there's a secret door in the ceiling of the elevator, but if you climb onto the top you will get squashed for 44 damage at the end of the round!)
- Arrival: Once at the top, the portcullises retract. The heroes are at K31 (page 63).
- Strahd: Strahd can hear the elevator - it's loud. He may make his way here to pummel the heroes.
- Return: One round after the elevator comes up, the portcullises lower again and it goes back down.
K62. Servants' Hall: Mongrelfolk stats are on page 234. Hag Eye info is on MM page 176. Remember that Morgantha the hag (the dream pastry lady, page 127 and 48) can see through this. Cyrus will try to lead the group to the elevator and trigger the trap. Then he'll drag their bodies to Escher's lounge (page 70). You can also do a thing where Cyrus leads the group to their guest room. A lot of the rooms in this area have special things that happen if Cyrus is with the party.
K63. Wine Cellar: (page 77) Yellow mold is on DMG page 105. Touch it: 10 foot cube of spores. DC 15 CON save or 11 damage and poisoned. You take 5 damage per round until you make your save. Black pudding is on MM page 241.
K65. Kitchen: (page 78) Zombies are MM page 316.
K66. Butler's Quarters: (page 78) Desecrated ground is on DMG page 110. Undead have advantage on saves.
K69. Guards' Quarters: (page 79) Skeletons are on MM page 272.
K72. Chamberlain's Office: (page 79) Rahadin stats are on page 237. Remember that he has that scream aura that does a lot of damage. Shadow demon stats are on MM page 64. Rahadin has a special scene when Strahd dies (see page 207) so really play up his slavish devotion to Strahd.
K73. Dungeon Hall: The group has no chance of detecting these traps unless they use magic or are extremely clever. Remember that each trap goes off once, then they need to recharge for 24 hours. Refer to the map on page 75 to get a nice look at where the victims are teleported to. Notes on the side-prisons:
- K74c. Rotting Corpse: Potion of heroism is on DMG page 188. 10 temporary hit points and +d4 to attack rolls and saving throws for an hour
- K74g. Gray Ooze: Gray ooze in on MM page 243.
- K74h. Lost Sword: Crusader's mantle is on PH page 230. For one minute, you and your allies do +d4 radiant damage.
- K75a. Prisoner: Remember that he will betray them when it is advantageous. Werewolf stats are on MM page 211. His wife, Zuleika, is on page 204. She has some child prisoners, and she will gladly set them free in exchange for Emil.
K76. Torture Chamber: (page 82) Strahd zombies are on page 241.
K78. Brazier Room: (page 82) Iron golems are on MM page 170. Remember that if the heroes attack something in here, the doors shut and magically lock. To breath weapons, heroes must save for each.
Teleportation page numbers:
- Red: Page 66
- Orange: Page 74
- Yellow: Page 93
- Green: Page 118
- Blue: Page 195
- Indigo: Page 152
- Violet: Page 157
K84. Catacombs: (page 85) Lots of notes. This is a very crucial area:
- Doors: The crypt doors require a DC 15 STR check to move them.
- Bats: The bats don't attack unless provoked.
- Trap: This teleport trap sends an adventurer into crypt 14 (page 88) with 14 wights! One wight is teleported out and appears where the hero was. I marked it on the map below.
 |
| Catacombs, page 85 |
Crypt notes:
- Crypt 4: (page 86) Ghost is on MM page 147.
- Crypt 6: (page 86) Poison darts are on DMG page 123. +8 to hit, 2 damage and a DC 15 CON save: 11 poison damage, half on save. St. Markovia's thighbone is on page 222. It's like a mace of disruption (DMG page 179).
- Crypt 7: (page 87) Gargoyle is on MM page 140.
- Crypt 9: (page 87) Deck of illusions is on DMG page 161.
- Crypt 14: (page 88) This is real nasty if a PC gets teleported in from the trap (see above). Wights are on MM page 300. Remember, when a wight is slain, it becomes 2d6 skeletons! Skeletons are on MM page 272.
- Crypt 15: (page 88) Staff of power is on DMG page 202. Remember, the first time it is grabbed it does piles of damage, CON save for half.
- Crypt 20: (page 89) Sasha Ivliskova seems like an awesome NPC. Vampire Spawn is on MM page 298.
- Crypt 21: (page 89) Banshee is on MM page 23. Archmage spells are on MM page 342. Time stop! She has been visiting her brother (see page 121). Patrina is mentioned on page 208 ("Consorts Unleashed"). If she survives this adventure, she is going to try to become Barovia's new master.
- Crypt 27: (page 90) Giant wolf spider is on MM page 330.
- Crypt 29: (page 91) Brown Mold is on DMG page 105. DC 12 CON save, 22 cold damage, half on save. Fire makes it expand. Luck blade is on DMG page 179. Read up on wishes on PH page 288. Wish duplicates any 8th level spell or lower, heal 20 people, undo a single recent event, etc.
- Crypt 31: (page 91) Spiked pit is on DMG page 122. DEX save DC 12? 11 damage plus 3d6 falling damage. The trap doors close. You need to make a DC 20 STR check to open them (locking pit DMG page 122).
- Crypt 33: Sir Klutz might not fit the tone of your game, so you might want to rename him if you think it won't go over well. Have his stats ready, as he is a potential NPC ally. Phantom warrior stats are on page 235.
- Crypt 34: (page 92) Imp is on MM page 76.
- Crypt 35: (page 92) Ghoul is on MM page 148.
- Crypt 38: (page 92) Hell hound is on MM page 182.
- Wraith is on MM page 302.
- Crypt 39: (page 39) Beucephalus the Wonder Horse! Strahd will be really angry if they kill it. Nightmare is on MM page 234.
K85. Sergei's Tomb: (page 93) If Ireena is with the group, maybe have her have a vision or something. After all, this is the body of the dude she was in love with in a past life.
K86. Strahd's Tomb: (page 93) Strahd's brides! Vampire spawn are on MM page 298.
Chapter 5: The Town of Vallaki
This area is scaled for level 4 characters.
There's a lot of fun stuff in this chapter, but there is an awful lot of organizing to do. I have tried to list the plots and NPCs as succinctly as possible so you can make sense of this rather dense chapter. But first..
Poison Needle Traps: (DMG page 123) This chapter is full of poison needles! If you fail to pick the lock: 1 point of damage, 11 poison damage and a DC 15 CON save. Fail = poisoned 1 hour (one of the needles in this chapter knocks you unconscious).
Organize Your NPCs: You're going to have to decide what NPCs to "feature." You have a million options.
Lady Wachter has an imp and a spy that you could do a lot with, or nothing at all. The group should probably meet
Blinsky, as his toys are strewn all throughout the adventure and his toy shop is very amusing. Don't forget to
check out this page for more toy options. The heroes should definitely meet
Rictavio - he's a big deal. I get a kick out of
Stella (Lady Wachter's daughter) so you might want to send the heroes into her house for some snooping around. Also,
Izek Strazni is really cool (page 231). He's been dreaming about Ireena and he will abduct her if he sees her.
Why Are We Here?
Remember that Ismark wanted to try to bring Ireena here for safe-keeping, but in the end Ireena is going to have to stick with the group to prevent Strahd from killing her. Rictavio is an important PC who can help the group figure out their tarokka reading and he can point them in the direction they should go.
The group might also be here looking for one of the treasures, depending on your tarokka reading results. Once the adventurers arrive, there's a number of plots for you to unleash on them. Finding a treasure will put them through one "quest" of some kind. It's up to you to use the other ones if you want. The main one seems to be:
 |
| The Coffin Maker |
The Bones: There were magic bones (page 97) in the church that did keep Strahd away, but Milivoj
the local weirdo stole them. The group needs to go to the coffin maker
to get them back. It turns out that the coffin maker cut a deal with
Strahd. He's got vampire spawn hanging out at his place (page 116). They
are getting ready to attack the church. If the heroes don't deal with this within three days, then an "event" happens:
- St. Andral's Feast: (page 124) 3 days after the heroes arrive in town
and haven't dealt with the bones at he church yet, the vampire spawn
attack the church. It's a pretty crazy attack. In the middle of a
service, the spawn and bat swarms attack the congregation! Strahd comes
in and attacks the priest! People blame the burgomaster and set his home
on fire.
On that same day as the vampire attack (which is 3 days after the heroes arrive in Vallaki), there is a festival:
The Festival of the Blazing Sun: (page 123). A guard laughs at the burgomaster and is tortured as punishment. If the heroes intervene, they are banished and may befriend the Keepers of the Raven.
There are other events and likely scenarios you can utilize as you wish:
The Tiger: (page 123) Rictavio's tiger gets loose. This one is best used after the heroes meet Rictavio and befriend him. Rictavio will flee to the tower (page 167).
Dinner Party: (page 124) The heroes are invited to Lady Wachter's place for dinner. She wants to see if the heroes can kill the Burgomaster. She'll probably end up enlisting the Vistani to kill the heroes once they leave Vallaki. The Vistani are scared to do it, so they contact Strahd, who may decide to ambush the adventurers.
The Keepers of the Feather: (page 98) The heroes will probably meet these lawful good people if they go to the inn, or if they oppose the Burgomaster in some way. They are wereravens (stats on page 242) that oppose Strahd. They protect the Blue Water Inn. It is possible that the heroes befriend the keepers if they try to free the poor people in the stockade (page 119).
 |
| Vistani Camp |
The Vistani: (page 119) This camp also has dusk elves, who aren't happy with Strahd. Their leader Kasimir (page 121) can tell the heroes about the Amber Temple and how the secret to ending Barovia's curse might be there. Luvash (page 122) will want the heroes to find his daughter (see page 38, a guy wants to drown her). A dusk elf named Savid went looking for her, but he never returned (he's on page 133 - he's wounded and hiding in Argynvostholt).
The Wedding Gown of The Baroness: The adventurers can loot a wedding dress on page 108. This gown is needed for a quest on page 155. A crazy guy made a flesh golem bride for Strahd. So just keep that in mind. If the heroes loot this thing, it will help them out quite a bit.
Important Location
The Blue Water Inn: (page 98) There's a lot of people that can be found in the inn, and time of day is a bit important. Here is a quick cheat sheet:
Morning: No patrons. At dawn Rictavio brings food "to Blinsky."
Noon to Dusk: 2d4 locals. At dusk, Rictavio brings food "to Blinsky."
Dusk to Midnight: 2d8 locals.
- (Owners) Urwin & Danika Martikov: Wereravens, lawful good.
- Brom & Bray Maritkov: Children of the owners, also wereravens.
- 1d4 Wereravens: In raven form on roof, or in taproom in human form.
- Szoldar Szoldarovich & Yevki Kruhkin: Wolf hunters.
- Nikolai & Karl Wachter: Brash drunkards.
- Rictavio: A "carnival ringmaster from a distant land." (see below)
Missing Ravens: If they befriend the heroes, you might want the Keepers to mention that animated scarecrows have been attacking them and snatching ravens. This is the work of the hag Baba Lysaga (page 161). Just be careful when doing this, because the heroes might decide to go investigate - that area is meant for level 8 characters. Lysaga has extremely powerful spells and her hut is no joke, either.
NPCs
There are a few important NPCs in this chapter that have a lot of little details to keep straight. Here they are:
Rictavio: (stats page 238) He's got a sword cane, which is very cool. Remember that he can cast cure wounds spells, which will really help the heroes. He's also got a scroll of raise dead! I wrote more about this guy in
my guide to Strahd.
- He's actually Dr. Van Richten in disguise.
- He's trying to learn about the wereravens. He wants to kill the Vistani.
- He was cursed by a Vistani seer long ago: Doom comes to all those he befriends.
- He has a pet sabretooth tiger that wears armor (AC 17) and is trained to hunt evil Vistani.
- Hat of Disguise: (DMG page 173) It casts disguise self (PH page 233) at will.
- Ring of Mind Shielding: (DMG page 191). Remember, he can make this ring invisible. When you die wearing this, your soul is sucked into it. Almost seems like a way to smuggle a soul out of Barovia via the Vistani. Maybe there's already a soul in it. If Van Richten dies in your game, this might be a cool thing to take advantage of.
- He stays in the guest room at the inn on page 102.
- His wagon is on page 115.
Baron Vargas Vallakovich
- He runs a festival every week - he thinks they keep the devil Strahd away.
- Thinks everyone is beneath him. Those who speak ill of the festivals are arrested.
- He lives in a mansion on page 104.
- His butler and a lady-in-waiting have gone missing (his son accidentally killed them, see page 109).
- (Wife) The Baroness: She has daily tea and sandwich parties for locals. The priest, Lucian Petrovich, is her brother.
- (Son) Victor: Creepy guy. He stays in the attic, and is trying to use
magic to escape Barovia. His workroom is on page 109. He has six undead skeleton cats.
- (Henchman) Izek Strazni: (stats on page 231) Has an evil, barbed arm that conjures fire. He forces the toymaker to make him dolls that look like Ireena (page 118).
- (Pets) Two mastiffs (MM page 332).
Lady Fiona Wachter
- She is loyal to Strahd, wants to take over Vallaki.
- Her home is on page 110.
- She started a cult of devil worshipers.
- Her daughter is locked in the attic.
- She sleeps with the corpse of her dead husband!
- (Daughter) Stella: She acts like a cat, is locked in the attic. She's actually chaotic good and will latch on to any character that is nice to her.
- (Sons) Nikolai & Karl: Local troublemakers.
- (Imp) Majesto: Her invisible servant who eavesdrops (page 115).
- (Spy) Ernst Larnak: Keeps Fiona informed, willing to blackmail her.
Chapter 6: Old Bonegrinder
This area is scaled for level 4 characters.
This is really crazy. Three hags live here. They steal children, kill them, put their bone dust in their dream pastries and sell them for people to eat!
Deadly: Be aware that these hags are really powerful and can easily kill a party of 4th level characters. They do not attack right away - they assume the heroes want to buy dream pastries. You can have NPCs like Ireena warn the heroes about the hags. The raven also tries to warn them.
Green Hags: The author himself changed these to green hags when he ran this, so you might want to do so as well. He had Morgantha away to start. The heroes crept in, battled the daughters, and the daughters jumped out the window to escape. Then Morgantha pulled up at the door with dream pastries and a freshly-captured child named Emmerich.
Once the heroes see the captured kids, they are probably going to want to save them. These hags have an AC of 17 and 112 HP each! In one round they can fire off three lightning bolts. The party could die before they even get to go once. You could have it where the group chats up the daughters while a hero frees the kids and they make a run for it.
All of them are night hags (MM page 178). They are:
- Morgantha: The mother in room O2 on page 127.
- Bella Sunbane: Daughter in room O3 on page 127.
- Offalia Wormwiggle: Daughter in room O3 on page 127.
They have two captive children that parents gave to the hags. The daughters are pricking with needles (page 127):
- Freek: 7 years old.
- Myrtle: 5 years old.
 |
| Night Hag Int mod is +3, so: DC 15 and +7 spell attack |
Hag Coven: The three hags use the "hag coven" rules on MM page 125. They share a bunch of spells.
List of Stuff in Area O1: Lots of stuff in here. This is a concise list:
- 12 dream pastries baking in an oven.
- Barrel of greenish black ichor (Morgantha can use it to scry and summon dretches).
- Bowls of herbs, flour, sugar, powdered bone.
- 12 locks of hair.
- Chicken coop with three chickens, 1 rooster, and a few eggs.
- Wooden trunk containing 100 harmless croaking toads.
- Various concoctions (Check out this list for ideas on what the other concoctions might do), including three labeled elixirs...
- Elixir of Youth: You look younger and more attractive for 24 hours.
- Elixir of Laughter: Gives you cackle fever (DMG page 257). It kicks in d4 hours after imbibing. DC 13 Con save, fail = 5 damage and incapacitated with mad laughter for one minute. It can spread to other people within 10 feet.
- Mother's Milk: It's pale tincture (DMG page 258) DC 16 Con save, fail = 3 damage and poisoned. Save against poisoned every 24 hours. Even when you make your save, you need to keep saving each day for a long time.
Chapter 7: Argynvostholt
This area is scaled for level 7 characters.
This has an interesting backstory. This chapter is about revenant knights who served a silver dragon slain by Strahd. The knights feel Strahd is being punished and thus they have nothing to do but seethe with anger.
The Beacon: The main idea here is for the heroes to get the dragon's skull from Castle Ravenloft (it's in the Hall of Bones on page 78) and bring it here to the dragon's mausoleum (page 134). Once lit, the beacon puts the revenants to rest and gives the heroes a bonus to AC and saves. It's kind of weird, because Castle Ravenloft is the final destination, right? So coming here is nice, to free the revenants, but the bonus isn't really helpful because the game is over.
This Might Bore Players: Honestly, reading through this place, you should probably avoid running this like a dungeon crawl. There's a lot of empty, dull rooms. This is more of a ponderous place where the heroes learn about the knights and have encounters with the ghostly spirit of a dragon. It's cool, but it could really be a drag if you don't cut to the chase. You should read this thoroughly, note the cool places and get the heroes there. Don't forget about how the spirit leads the heroes to the revenants, it's very cool and different.
Angry Knights: The revenants will immediately attack the heroes. Remember that if they are slain, they are reborn elsewhere in Barovia (roll on the chart on page 130) and will come for revenge.
Vladimir Horngaard: (Vlad's stats on page 241) If he has a treasure determined in the tarokka reading, you should look it up and let him use the item's powers.Definitely read pages 241-242. His revenant stats are adjusted.
Sir Godfrey Gwilym: Fun fact: Chris Perkins said on twitter that Godfrey is related to a character in the novel
I, Strahd,
Alek Gwilym. (Spoilers incoming) Alek was Strahd's fiercely loyal right hand man when Strahd was mortal. Strahd actually killed Alek to hide the fact that he had become a vampire.
Revenants: Stats are in the MM on page 259. They regenerate, they are immune to turning, and they have a paralyzing glare!
Phantom Warriors: Stats on page 235.
Potion of Invulnerability: (DMG page 188) This is found in the Knights' Quarters on page 136. For one minute, you have resistance to all damage.
Chapter 8: The Village of Krezk
This area is scaled for level 5 characters.
If Ireena is With the Party: Once the group is in Krezk and near the pool, run "Something Blue." (page 156) Sergei's spirit will actually have a chance of stealing her away! Strahd will flip out and show up, very cool.
Special Events: There's some quests on page 155-156. Most of them have a variation of: The Abbott wants a wedding dress, and he'll raise the dead son of the burgomaster in exchange.
Deva Stats: The Abbot is a deva (MM page 16). Deva stats are actually a little confusing to find.
Roll in Advance: There are around 100 mongrelfolk in the abbey. You should roll on the madness table (DMG page 260) for some of the mongrelfolk (page 147). You should also roll their "special ability" on the chart on their stat block on page 234. It'll give you a chance to develop them a little bit, rather than stopping the game and rolling on two charts in two different books.
Getting In: Just getting in to Krezk is hard. The guards won't let the heroes through the gate. The burgomaster comes and will tell the heroes he'll let them in if they go get wine from the Wizard of Wines (page 174).
S4. Pool and Shrine: (page 146) Drinking the water has the effects of lesser restoration (PH page 255). It ends a disease or one certain condition: blindness, deafness, paralyzed, or poisoned.
Gazebo: This gazebo is badly wounded, so the heroes actually have a chance to take it down. A treasure might be beneath it.
Mongrelfolk: Stats on page 234. Remember, they can mimic voices. That might be handy for leading heroes into an ambush.
Mongrelfolk NPCs: Here's a list of the mongrelfolk NPCs so you can get the essential info at a glance:
Otto Belview: (page 147) Sleeping guard.
- He has a wolf's snout.
- Standing leap
- Madness: He thinks he is the best
Zygrek Belview: (page 148) Sleeping guard.
- Half her face has scales, the other half fur
- She has darkvision.
- Madness: She doesn't like people judging her.
Mishka Belview: (page 150) Creepy guy hiding in a well.
- She has three red spider eyes on the right side of her face.
- He has spider climb.
- Madness: He enjoys killing people.
Marzena Belview: (page 150) She's chained to a post and skittish.
- She has bat wings and spider mandibles instead of a mouth.
- Madness: She thinks she's being watched by powerful enemies all the time.
Clovin Belview: (page 153) The Abbot's Manservant
- Two heads, one is basically a baby with a snake tongue. That head only hisses.
- The others want him to starve to death, he's a food hoarder.
- Madness: "Being drunk keeps me sane."
S7. Graveyard: (page 148) Here's another one of those deals where an item you loot in the castle can be used. This time it's a holy symbol (page 87). You can use it to get a ring of regeneration (DMG page 191) which lets you regain d6 hit points every ten minutes.
Wights: MM page 300. Life drain! Yikes.
S13. Main Hall: This is awesome. The Abbot is trying to make a bride for Strahd using corpse parts. Remember, she can't speak and the stitches/seams aren't visible until she is closely inspected. she's got a lot of powder on her.
The Dress Quest: The Abbot wants a wedding dress. If the heroes bring him on, he'll use raise dead for them 3 times if they end up needing it. Check out page 155. There's a quest involving the dress. The heroes will need to escort the burgomaster's wife to Vallaki, and will need Lydia Petrovna's wedding gown (page 108)
Stat Stuff:
- The Abbot: He's a deva (MM page 16). He also has stats on page 225. He thinks he's good, but he's lawful evil. He does a lot of damage. 25 points!
- Flesh Golem: MM page 169.
- Potion of Superior Healing: DMG page 188, top left of the page. Heals 8d4+8!
- Scroll of Heroes Feast: PH page 250. Once you eat it, increases HP Max by 2d10 for 24 hours, immune to poison, etc.
- Shadows: MM page 269.
Chapter 9: Tsolenka Pass
This area is scaled for level 8 characters.
The group will have to traverse this pass to get to the Amber Temple.
Heading to the Pass: Don't forget to read the flavor at the raven river crossroads, page 40.
Extreme Cold at Night: Extreme cold is on DMG page 110. Each hour, roll a DC 10 CON save. Fail = gain one level of exhaustion (page 291).
Crossing the Bridge: It's a 500 foot drop! A roc (MM page 260) attacks, see "Roc of Mount Ghakis" on page 159.
Vrocks: MM page 64.
Snow Maidens: (page 159) Stats of a specter (MM page 279) with additional traits:
- Immune to cold
- Life Drain does cold damage
The Giant Goat: (page 160) As the group travels on the pass, a...
giant evil goat (MM page 327) attacks and tries to headbutt a hero
over the side. They plummet 100 feet.
Chapter 10: The Ruins of Berez
This area is scaled for level 8 characters.
Berez is a village that was flooded and abandoned and now an evil hag lives in the middle of the ruins. You'll probably want to have her hut attack the heroes, check out the special event on page 166. Creeping Hut stats are on page 226.
In Berez, there's a statue of a woman who was the previous incarnation of Tatyana. There's also a potential ally here named Muriel Vinshaw, a wereraven (stats on page 242).
Scarecrow stats are on MM page 268.
Baba Lysaga: This chapter is all about Baba Lysaga. She's a great villain. Here's the essential info:
- Stats on page 228.
- Stole a magic gemstone that has animated her hut. Does everything she can to keep the heroes from getting the gem.
- Flies around in a giant skull (effectively giving her AC 20).
- If she has time to prepare before a battle, she could summon d4 insect swarms (stats on MM page 338)
- You should look up some of her powerful spells, like power word stun and finger of death (!!).
- She helped raise Strahd and considers herself to be his true mother.
- She is allied with the barovian witches in Castle Ravenloft (page 72).
- Sacrifices beasts to Mother Night and collects their blood, bathes in the blood to stave off old age.
- Makes animated scarecrows that attack the ravens and wereravens.
U3. Baba Lysaga's Hut: (Page 163)
- It's easy to sneak up to it without alerting Lysaga because the trapped ravens in here are making a lot of noise.
- Giant Skull: Remember, nobody else can use this except Lysaga. She can fly around in it and it gives her three-quarters cover (+5 to AC and DEX saves).
- Programmed Image: PH page 269. Physical objects pass through it. Disbelieve: INT (Investigation) check DC 17.
- Crawling Claws: MM page 44.
The Creeping Hut: Remember, once the group gets in the hut, they're probably going to get the gem and de-animate it. So if you want the heroes to fight the hut, have it attack before they get in it. Also remember that Lysaga does everything she can to stop the heroes from getting the gem. Here's essential info on the hut:
- Stats on page 226.
- Everything in it is bolted down.
- The heroes can see a glowing green thing under the floorboards.
- The hut contains a cage of captured ravens, a "baby Strahd" in a crib and a pile of treasure
- The hut lurches from side to side when it walks and it shakes the ground with every step.
- It's powered by a gem stolen from the Wizard of Wines. Removing it incapacitates it.
- Remember that it has blindsight 120 feet!
- It does double damage to objects and structures.
U6. Standing Stones: These stones can boost druids who wild shape, and they can also protect you from those who scry.
Chapter 11: Van Richten's Tower
This area is scaled for level 6 characters.
Ezmerelda Intro: This might be the best place to introduce
Ezmerelda to the heroes. Check out "Ezmerelda's Retreat" on page 172. She shows up here badly wounded. Her stats are on page 231. Remember, she
has a prosthetic leg, she's looking for van Richten even though they
don't get along, and she has got a lot of powerful spells that can help
the heroes big time. I think she's a really cool NPC.
This chapter is about exploring a tower once owned by a lich. The heroes might come here with van Richten, in which case there will be no danger because this is his home. This is a really crazy place with some extremely deadly but awesome traps.
 |
| The symbol on the door, page 169 |
The Door: You should print out or draw the symbol on the door pictured on page 169.
V1. Ezmerelda's Magic Wagon: (page 168) Wow. What a nasty trap! Be ready for this! If it goes off, remember that a horde of werewolves will be here in one hour (see "Pack Attack" page 171).
V2. Tower Door: This is a part where the party's marching order matters big time. Be sure to establish where people are beforehand. If the trap goes off and there's not a clear idea of who was standing where, there could be problems. If this trap goe off, werewolves attack ("Pack Attack" on page 171).
Young Blue Dragon: Stats on MM page 91.
Animated Armor: Stats on MM page 19.
The tower has a spell drain effect:
- Antimagic Field: (PH page 213) Spells can't be cast, magic items become mundane!!
Chapter 12: The Wizard of Wines
This area is scaled for level 5 characters.
When the heroes show up here, they see a horde of twig blights rampaging all over the place. The family who owns the place (wereravens) are hiding in the woods. They ask the heroes to help.
Lots of Variables: This is a scenario that can go a million different ways. The group might end up fighting up to 60 monsters at once, or they might creep through the place and take them out piece by piece.
Best Possible Option: The quickest way to take them out is to destroy the Gulthias staff, wielded by the druid in room W16 (page 178). Once the staff is destroyed, all of the blights within 300 feet wither and die.
Needle Blights: (MM page 32) Remember that they have blindsight.
W15. Brown Mold: Brown mold is on DMG page 105. CON save DC 12 or 22 cold damage, half on save. Fire causes it to expand into aten foot square area. Cold damage wipes it out.
Once the group has dealt with the hordes, the family then tells them about the gems...
The Gems: This place was powered by three magic gems, but all of them have been stolen. Where the gems are:
- Gem 1: Stolen ten years ago.
- Gem 2: Stolen 3 weeks ago by Baba Lysaga. The gem has animated her creeping hut (see page 163).
- Gem 3: Stole 5 days ago by blights, placed inside the statue on page 198.
Another Attack: If the group goes to get a gem and comes back here, you could have the huge, evil tree attack (see page 180).
When it's All Over: If the heroes wipe out the blights and return two of the gems, they might be asked to do a delivery (page 180).
Chapter 13: The Amber Temple
This area is scaled for level 9 characters.
Here's the deal with this location. It is a giant dungeon and it feels sort of out of place in this adventure. If you have a group who loves hacking and slashing, then this will work out great for you. If not, you may want to shrink this down.
Also, this place is loaded with magic items.
I must say that the final rooms with the imprisoned vestiges are awesome and you should take a good look at them. This place is devoted to a "faceless god of secrets."
Vecna!
There are two "special events" for this chapter on page 196.
Extreme Cold: This place is freezing. Characters need cold weather gear or they have to deal with extreme cold (DMG page 110). DC 10 CON save each hour. Fail = a level of exhaustion (PH page 291).
Wand of Secrets: DMG page 211. It finds secret doors or traps within 30 feet.
X5. Temple of Lost Secrets: (Page 183) Remember that the arcanaloth is in the form of a confused old wizard named Heinrich Stolt. Once he is dropped to half hit points, he will say he was just guarding the temple, then turn invisible and flee.
Arcanaloth: Stats on MM page 313.
- He's in the statue firing spells out of the eyeholes. He has three-quarters cover (PH page 196). That's +5 to AC and DEX saves.
- If he hears the group coming, he can get mirror image going.
- Remember, he has counterspell and shield.
- He could drop a chain lightning on the heroes.. yikes. 10d8 lighting damage!
- Also don't forget he can teleport up to 60 feet as an action.
Flameskulls: Stats on MM page 134. Remember, they can cast fireball.
Robe of Useful Items: Stats on DMG page 195.
X15. Southwest Annex: You might want to make names for Helwa's five berserkers. In theory the group could befriend these people. Remember that the wolf is Strahd's eyes and ears.
Staff of Power: DMG page 202. It's loaded with spells and has all sorts of special powers.
Tome of Understanding: DMG page 209. Read it for 48 hours, gain +2 Wisdom.
X24. West Shrine: Sympathy Effect (Antipathy/Sympathy on PH page 214) WIS save DC 16 or get close to target and refuse to leave. Duration: 10 days!
X30. Preserved Library: The books appear to be empty but the heroes might be able to figure out how to read them. These books are full of "vile, forbidden lore."
You might want to brainstorm some topics/examples of the lore because the players will probably ask.
Forbidden Lore Ideas:
- Ordinary Necromancy: A tome written by Vecna, according to wikipedia.
- Souls and the Undead: A book about how souls leave the body and thus undead have no souls - they are powered by an "animus." (check out the 4e Open Grave book, page 7)
- Theories on the Tome of Shadow: The Tome of Shadow is an artifact (also from Open Grave) that contains secrets about the Shadowfell, including the location of secret planar portals.
- Maybe something relating to The Tome of Shared Secrets or the Compendium Maleficarium both mentioned here.
- The Head of Vecna: If you are a jokey kind of DM, maybe include something about the Head of Vecna.. maybe hype up its powers and get the players excited about finding it.
X33. Amber Vaults
These chambers allow the heroes to connect with with different vestiges. A character can get a different 'dark gift' from each of them. Accepting a gift means a DC 12 CHA save. Fail = alignment shifts to evil. Most of the gifts are spells the character can cast three times.
What is a Vestige? On page 181, a vestiges are defined as "
remnants of dead, malevolent entities.." In the 3e Tome of Magic, vestiges are entities that exist outside of the rules of reality. They are untraceable, untouchable and they defy powers that try to define them. The Tome of Magic lists a ton of vestiges, a few of which appear in Curse of Strahd as well.
These vestiges and their gifts are so cool that you might want to use them for villains or NPCs in whatever campaign you are running. Seriach the Hell Hound Whisperer - that's clearly an NPC you want in your campaign, right?
Shami Amourae: One vestige that sticks out to me here is
Shami Amourae. Shami Amourae is one of the four original succubi. She got on Demogorgon's bad side and he imprisoned her in the Wells of Darkness (see Dungeon magazine issue 148). She is meant to be freed at the end of that adventure. I don't understand how she ended up as a vestige. It seems like a waste of an awesome NPC.
Here's a list of the vestiges and the major details:
- Fekre, Queen of Poxes: Gift = Contagion three times. Character reeks of filth.
- Zrin-Hala, the Howling Storm: Gift = Cast lightning bolt three times. One side of the character's face sags and loses all feeling.
- Sykane, the Soul Hungerer: Gift = Raise dead three times. The character's eyes glow sickly yellow and they expect to be paid if they help someone.
- Savnoke the Inscrutable: Gift = Mind blank three times. Character's eyes melt but they can still see.
- Tarakamedes the Grave Wyrm: The character grows skeletal wings and a fly speed of 50. This character must eat one pound of bones or grave dirt each day or die.
- Shami Amourae, the Lady of Delights: Gift = Suggestion three times. Character gains an extra finger on each hand and can't get enough pleasure.
- Driznash, the Nine-Eyed Spider: Gift = Permanent spider climb ability. Character grows an extra eye which is blind and alway open.
- Dahlver-Nar, He of the Many Teeth: Gift = When slain the character instantly reincarnates (three times total). The character loses all of their teeth.
- Zantras the Kingmaker: Gift = +4 to Charisma! Character won't take no for an answer.
- Delban, the Star of Ice and Hate: Gift = Cone of cold 7 times. Character is terrified of fire.
- Khirad, the Star of Secrets: Gift = Scry three times. Character's voice becomes a low whisper.
- Yrrga, the Eye of Shadow: Gift = Truesight for one month. Character's eyes become starry voids and believes that all life is pointless.
- Great Taar Haak, the Five-Headed Destroyer: Gift = Fire giant strength for 10 days. Character likes to bully others.
- Yog the Invincible: Gift = +30 hit points for 10 days. Oily black fur covers the character's face and body.
- Norganas, the Finger of Oblivion: Gift = Finger of death three times. Character's blood becomes like black tar.
- Vaund the Evasive: Gift = powers of ring of evasion and amulet of proof against detection for 10 days. Character becomes twitchy and won't give straight answers.
- Seriach the Hell Hound Whisperer: Gift = power to summon and control 2 hell hounds one time. Character knows the Infernal language.
There's a couple more important vestiges on page 196. One of them is Tenebrous! That's undead Orcus!
 |
| Tenebrous |
If Orcus is alive during Out of the Abyss, how the heck is Tenebrous locked away in a crypt? Tenebrous is the bad guy in the classic Planescape adventure Dead Gods. I did some digging and in Dragon Magazine #417 we learn this:
"
A few even whisper that when Orcus was reborn yet again, whatever vestige of his divine spark that had given form to Tenebrous remained behind, and that the shadow's essence is still out there somewhere on the planes."
So there you go. Tenebrous and Orcus might be seperate entities now. Here's the other vestiges:
- The Vampyr: Evil creatures become vampires. The character becomes an NPC.
- Tenebrous: Gift = Evil creatures gain the knowledge of how to become a lich. This is the sarcophagus that Exethanter the lich touched. If you have it, check out Dragon Magazine 417 for a nice article on the story of Tenebrous.
- Zhudun, the Corpse Star: Gift = Bring a dead creature to life one time. The character looks like a corpse.
Chapter 14: Yester Hill
This area is scaled for level 6 characters.
This one is real short. The Ritual (page 200) is cool. Strahd shows up on his nightmare, and the druids begin their ritual. The group has ten rounds to put a stop to it, or else Wintersplinter the evil tree is born and rampages down to the Wizard of Wines.
Blood Spear: If one of the heroes is a ranger, druid or barbarian, you should definitely use "Blood Spear of Kavan" (page 200). The stats are on page 221. It gives temporary hit points when you kill someone and the chosen character gain +2 to hit and damage.
Gem: One of the magic gems from the Wizard of Wines is in the statue on page 198.
Y5. Wall of Fog: (page 200) The Mists rules are on page 23. DC 20 CON save each round or gain a level of exhaustion (PH page 291). When you're in the fog, you're heavily obscured (PH page 183) which means you are blinded - attacks rolls against the blinded person have advantage, and the blinded person's attack rolls have disadvantage
Chapter 15: Werewolf Den
This area is scaled for level 7 characters.
Of all the stuff in this book, this chapter feels the most "optional." I guess it really comes down to whether you want to throw werewolves into the mix.
You might want to set this up so that the prisoner kids are actually fighting in the Ring of Stone (page 205). Yikes.
Raven: You also might want to establish that there's a wereraven here watching the den (see Die Kinder, page 205). I personally like the idea of using Muriel Vinshaw (page 165), as she has a small role in this adventure and thus she is easy fodder to use for whatever.
Lycanthropy: (MM page 211) A hero might be bitten and become a werewolf.
DC 12 CON save. There's a big blurb about the curse of lycanthropy on
MM page 206.
Z5b. North Cave: (page 203) You might want to think in advance about Kellen's doll. It looks like one of the heroes, but it's in zombie form. If a hero was nearly killed by a certain attack, maybe give the doll the same wound.
Z7. Shrine of Night: Zuleika has 8 children as prisoners. She will want the heroes to rescue her husband Emil, who is imprisoned in Castle Ravenloft (on page 81). You might want to figure out the age (d6+6 years old) and names of the kids in advance.
Epilogue
Patrina and Escher are called out by name on page 208 as NPCs with schemes once Strahd is dead.
Appendix B: Death House
I wrote a whole
separate article about this adventure here.
Appendix C: Treasures
Tome of Strahd: (page 221) Remember that Strahd will want to kill whoever has this tome. There's a whole article about the Tome of Strahd in Dragon Magazine issue 348. It uses 3rd edition rules, but maybe you'll want to adapt some of the material. The tome has a bunch of new spells:
(lvl 4) Bloodstone's Frightful Joining: Your soul attempts to invade the body of an undead creature, leaving your own body lifeless. This lasts for one hour per level
(lvl 2) Curse of the Gypsies: You can choose from three curses..
- Bad Luck: Whenever the target rolls a natural 20, they must re-roll and take the second result.
- Mark of the Gypsies: The victim has a permanent mark on their
forehead that's invisible to all but the person's closest family and
companions. This mark causes negative reactions, and some NPCs may shun
them.
- Unnatural Aura: Animals can sense the victim from 30 feet away. They panic and regard the victim with fear.
(lvl 3) Rain of Terror: You cause unnatural rain (hot blood or writhing snakes) to fall from the sky that causes a fear effect.
(lvl 4) Strahd's Baneful Attractor: You cause spells to divert
from their original paths to strike a new target. So, magic missile or
scorching ray would be diverted.
(lvl 4) Wraithform: This is like gaseous form, except the target can move faster. Mindless undead do not perceive you as a threat.
Guess what? I'm finally done! I'll update this if new info comes out, or if you have some cool idea, etc.